This Saturday was a great day! My good friend, El, and her ADORABLE baby girl, Harper, came over to visit. Since becoming a mommy, El said she was really itching to do a DIY project and I was equally itching to find something to put on our bedroom dresser since recently adding the gold IKEA hardware. We decided to go with making accent trays while baby Harper took her nap.
Well, not all goes as planned - the little cutie patootie wanted to join in on the fun instead, so "Auntie" K took charge and hooked mommy up!
El picked up the "trays" from Michael's the day before. She saw on a blog that one girl used clear box frames and lined them with paper to create a tray. The frames were $8 each for the 11x14 size.
However, rather than lining the "tray" with paper, I thought it might be cool to take it a step further and spray paint a geometric pattern on the back side of the tray (so the inside could be wiped down easily) instead. It ended up being the easiest thing ever and would probably take a half hour. Or in our case, a few hours, since girlfriends need to chit chat!
Here's what you'll need:
- spray paint color of your choice (I picked us up gold metallic by Valspar) Cost: about $5 at Lowes
- 11x14 (or size of your choice) clear box frames (El found these at Michaels) Cost: $8 at Michaels
- 1" painters tape
- template of your choice printed out to fit inside of tray (geometric works best for taping)
Our wedding design was inspired by this tray from Up in the Air Somewhere. My friend, Sarah, gave us the actual tray as wedding gift, but I keep it protected from little hands in one of our glass display cabinets. I just love the pattern and thought it would be a perfect, subtle way to pull in a design from our wedding in our bedroom rather than a shrine of pictures (that's in the living room ; ) )!
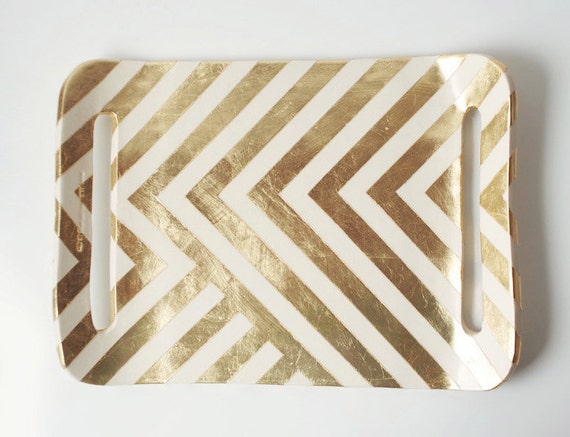 |
| Up in the Air Somewhere |
To make life easier, I printed out the pattern on 11x17 and trimmed it down to 11x14 so I could "trace" over it with painter's tape.

(note: plastic primer wasn't needed, I just grabbed it incase)
Next, take the template and flip it upside down in the frame. You'll need to tape it to the bottom so it doesn't fall down when it's flipped over.

I taped off where the 'negative space' was. Don't worry about being super accurate, they still come out great if it's not "perfect". Also, remember to tape the edges of the 'tray' so you don't get spray paint on them!

Next, spray away!

Once dry, begin to peel off the painter's tape.

...and Voila! Your pattern is complete! (of course, now I can't decide where I'd like to use them!)
To really protect the paint on the bottom, consider buying those small, clear pads for the base of the tray.


No comments:
Post a Comment